Installation Instructions: MkV/MkVI Volkswagen Golf/Jetta/GTI/GLI Subframe Locking Collar Kit DIY - 034-601-0024
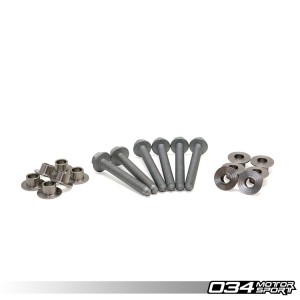
The installation of your 034Motorsport Stainless Steel Subframe Locking Collar Upgrade Kit for the 8J/8P Audi TT/A3 & MkV/MkVI Volkswagen Golf/Jetta/GTI/GLI/R32/Rabbit/Passat/Golf R is a relatively simple process that will take approximately 60-90 minutes to complete. This kit is designed to prevent subframe shifting and eliminate the associated clunks that are common on transverse-engine Volkswagen & Audi vehicles produced from 2005 - 2014.
Supplied Parts:
- 034Motorsport Stainless Steel Upper Subframe Locking Collars (Set of 6)
- 034Motorsport Stainless Steel Lower Subframe Locking Collars (Set of 6)
- High Strength M12x110 Factory Replacement Subframe Bolts (Set of 2)
- High Strength M12x90 Factory Replacement Subframe Bolts (Set of 4)
Tools Needed:
- Hands (Opposable Thumbs Are Optional)
- 13mm Socket
- 16mm Socket
- 18mm Socket
- Torque Wrench
- Breaker Bar (Do you even lift, bro?)
- Ramps, Lift, or Jack & Jackstands
Step 0 – Raise the vehicle securely on jackstands, ramps, or a lift, to access the front subframe. Make sure you have all tools needed to install the Subframe Locking Collar Kit. Flex your right bicep a few times to get a nice pump going.
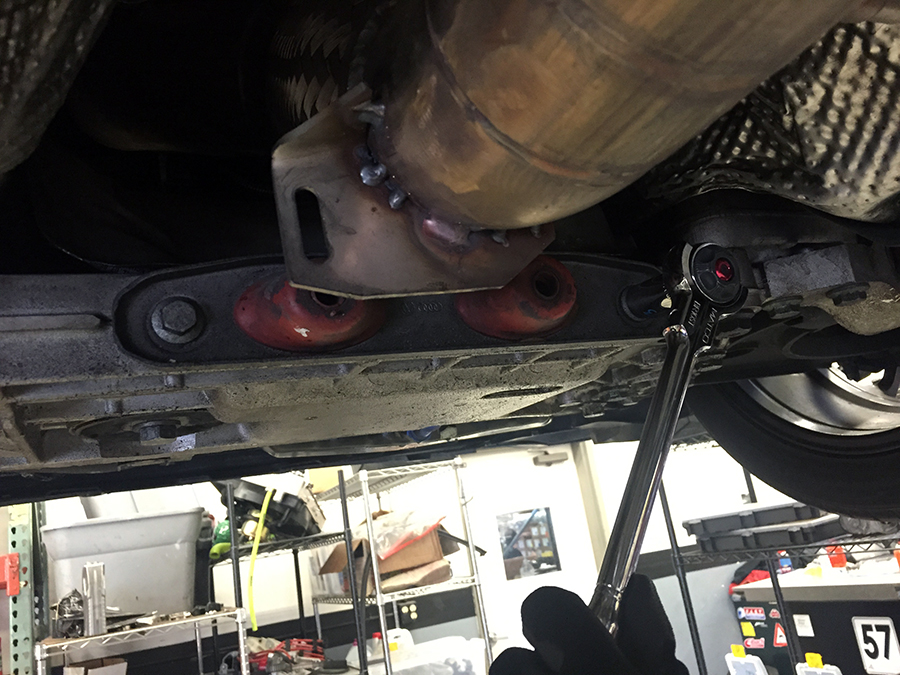
Step 1 – Now that you have a good bicep pump going, you’re ready to begin the installation process. We recommend wearing a tank top while performing the DIY, or cutting off the sleeves of your shirt for optimal results. Using a 13mm socket, remove the two 13mm bolts securing the front exhaust hanger to the subframe.
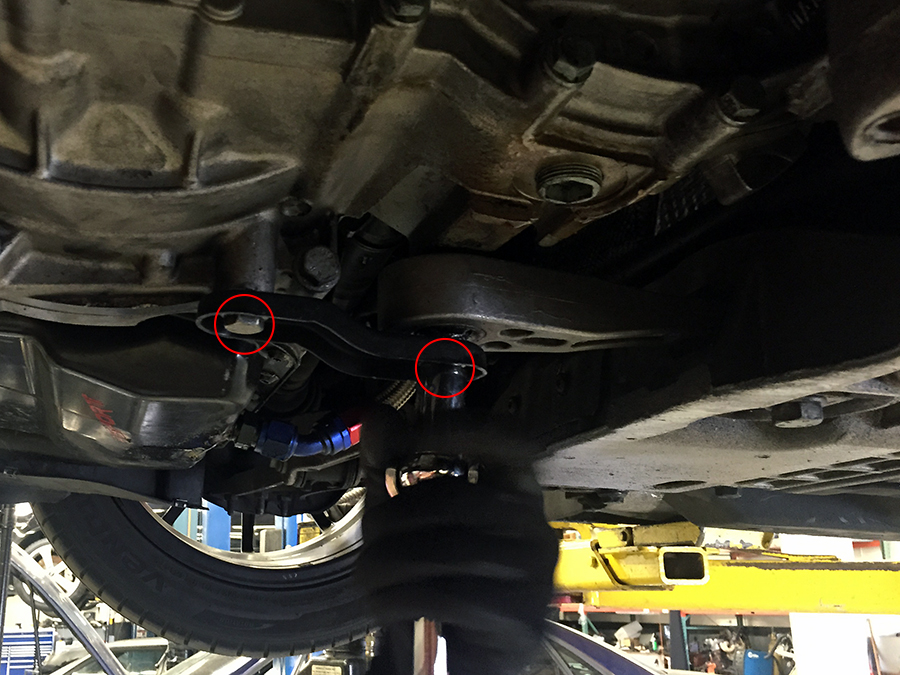
Step 2 – Remove the two 16mm bolts securing the dogbone mount (torque arm) to the transmission. Let the feeling of accomplishment overcome you. (Not too much, though! It’s nowhere near time for your post-success protein shake.)
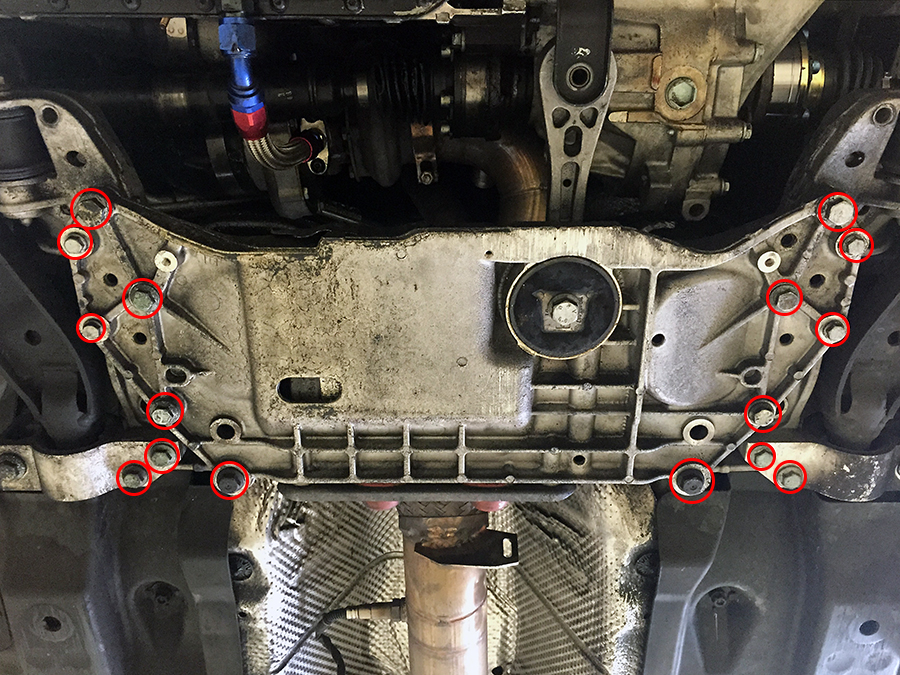
Step 3 – Loosen the 16 bolts circled below using 13mm, 16mm, and 18mm sockets. 4-5 counterclockwise turns should be enough to allow the subframe to shift for centering. This step can be performed with or without a breaker bar to tailor the resistance to your level of strength conditioning. We recommend a 45-60 second rest every 4 bolts.
Step 4 – Using an 18mm socket, remove the pictured bolt going through the control arm bushing mount. This bolt will be replaced with a supplied M12x90mm bolt once the subframe locking collars are installed.
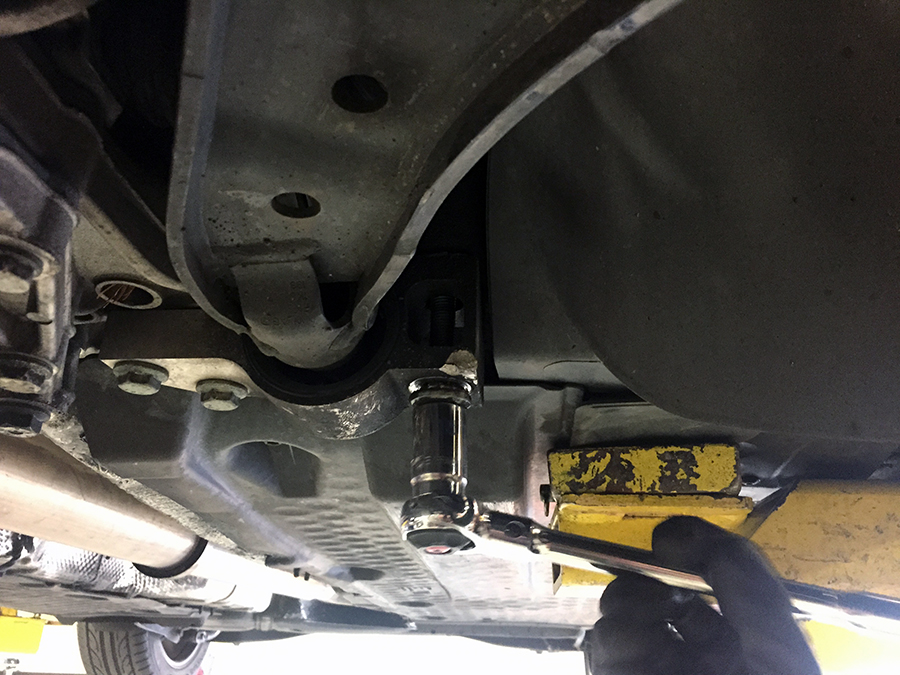
Step 5 – Note the installation orientation of the locking collars as shown below. The top collars have prominent subframe locating features at the top, while the bottom ones have flat surfaces for the shouldered M12 bolts.
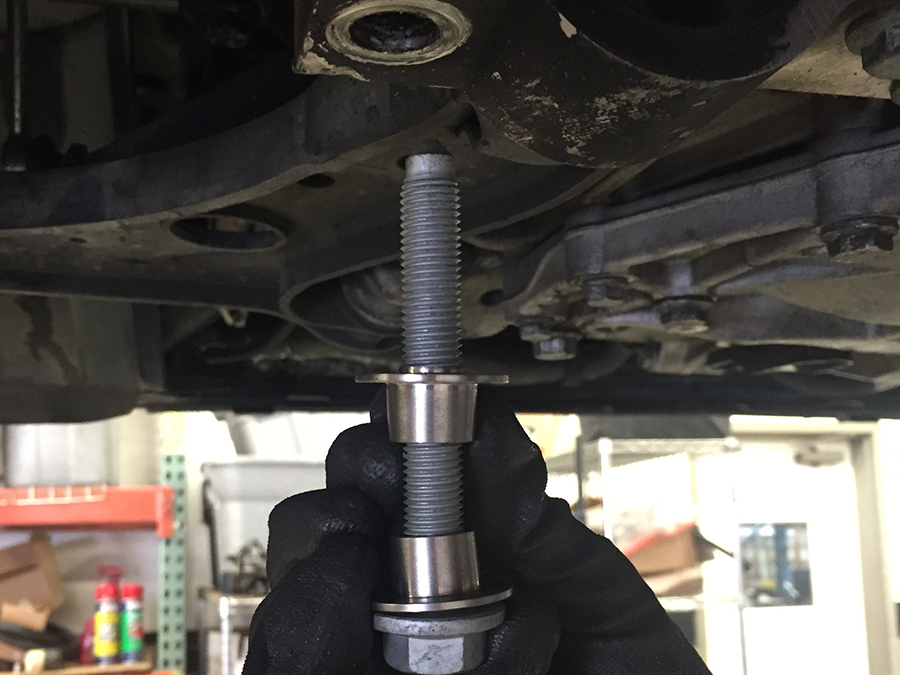
Step 6 – Gently (jk; you’re too swole to be gentle) pry the control arm bushing mount down until you have enough room to slide the top collar into place, in the top hole between the control arm bushing mount and subframe.
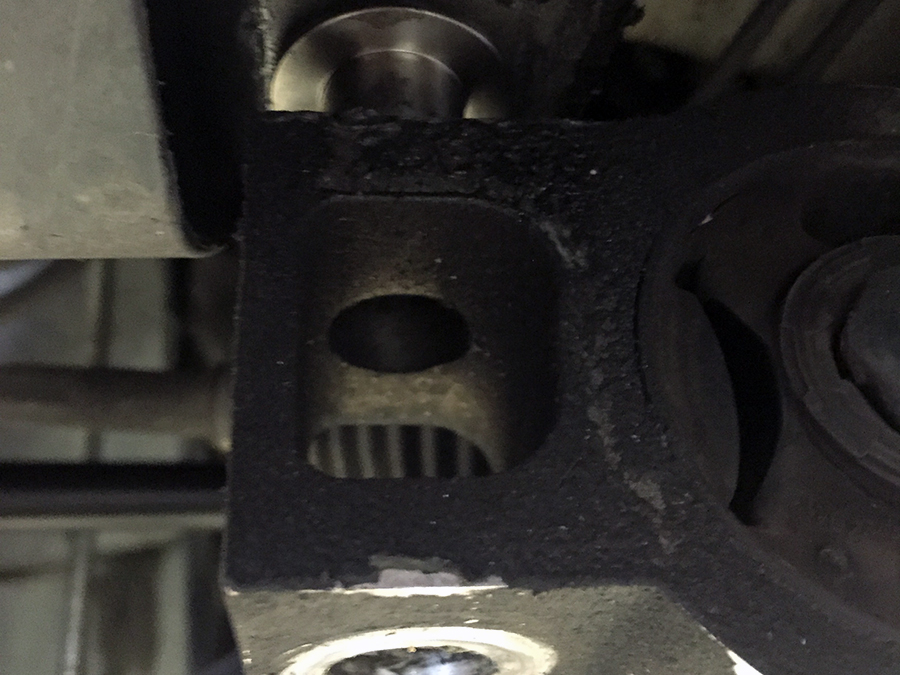
Step 7 – Install the bottom locking collar into the bottom of the control arm bushing mount, and thread in the supplied M12x90mm bolt a few turns to hold up the subframe while you install the rest of the collars. Repeat on the other side. Getting tired? Grab your shaker bottle and mix some preworkout! You’ve got a few more steps to go.
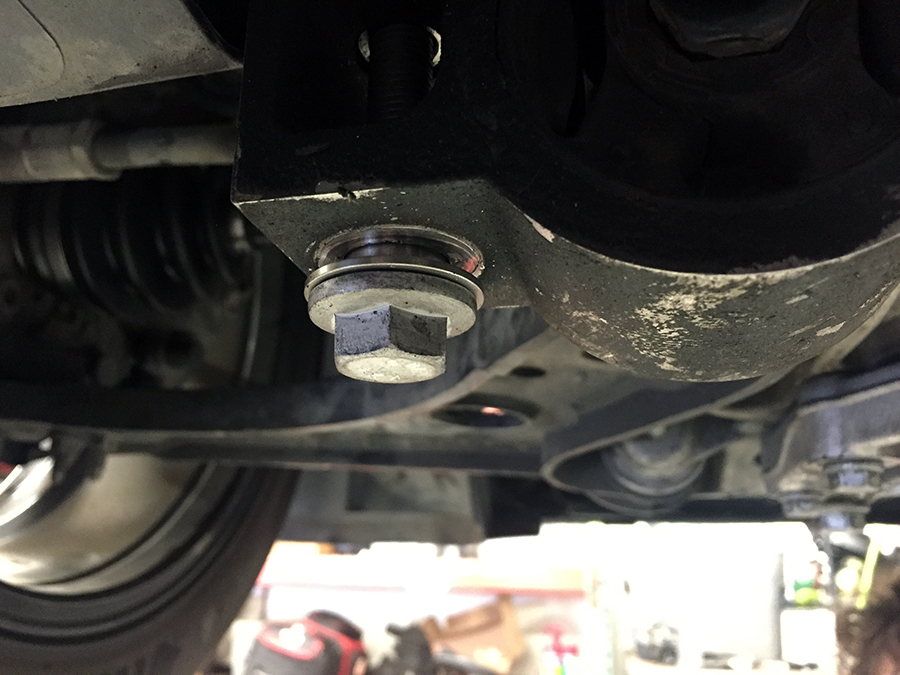
Step 8 – Using an 18mm socket, remove both rear subframe bolts, which are probably bent. These will be replaced with the supplied constant-diameter M12x110mm subframe bolts once the locking collars are installed.
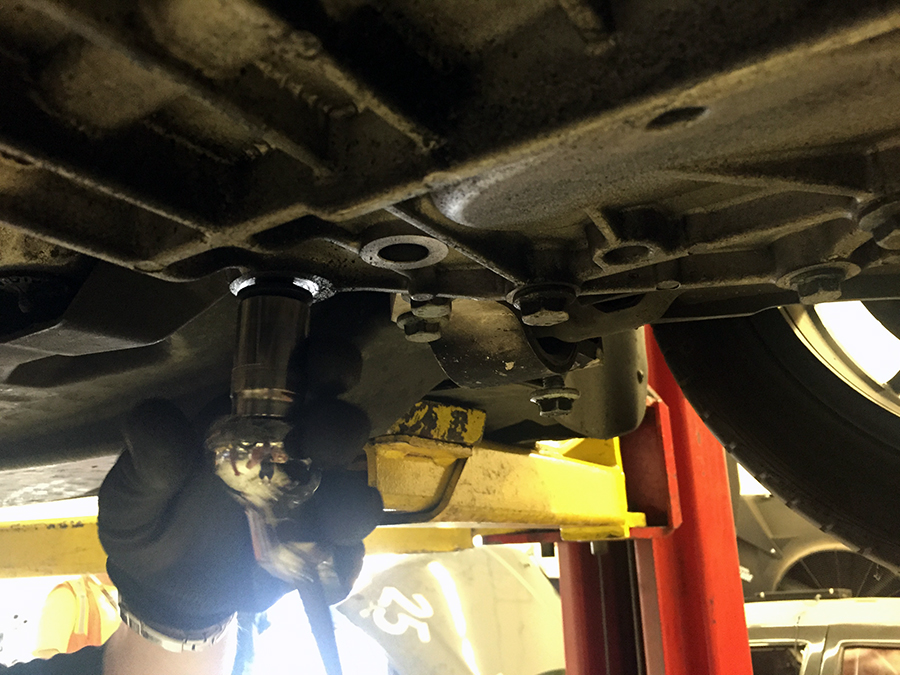
Step 9 – With both bolts removed, attempt to slide the top collars into the top of the subframe in the correct orientation. Drop the locking collars as your hand begins to twitch. Realize you consumed far too many scoops of preworkout in Step 7. Take a deep breath. Try again, making sure that the locating features are facing up to help center the subframe on the body.
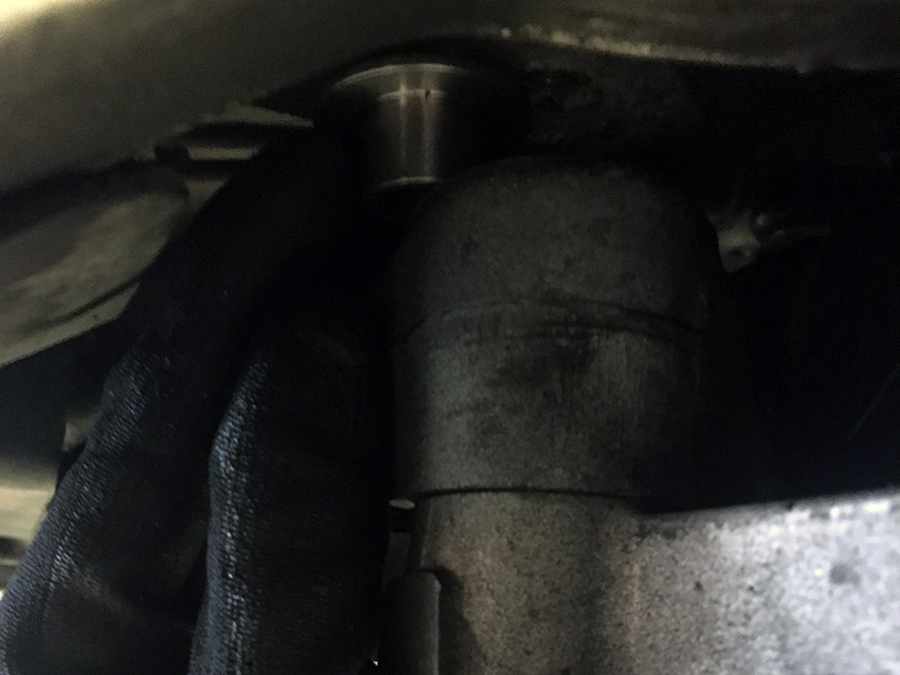
Step 10 – Install the bottom locking collars into the subframe, and thread in the supplied M12x110mm bolts a few turns to hold up the subframe while you install the remaining two collars.
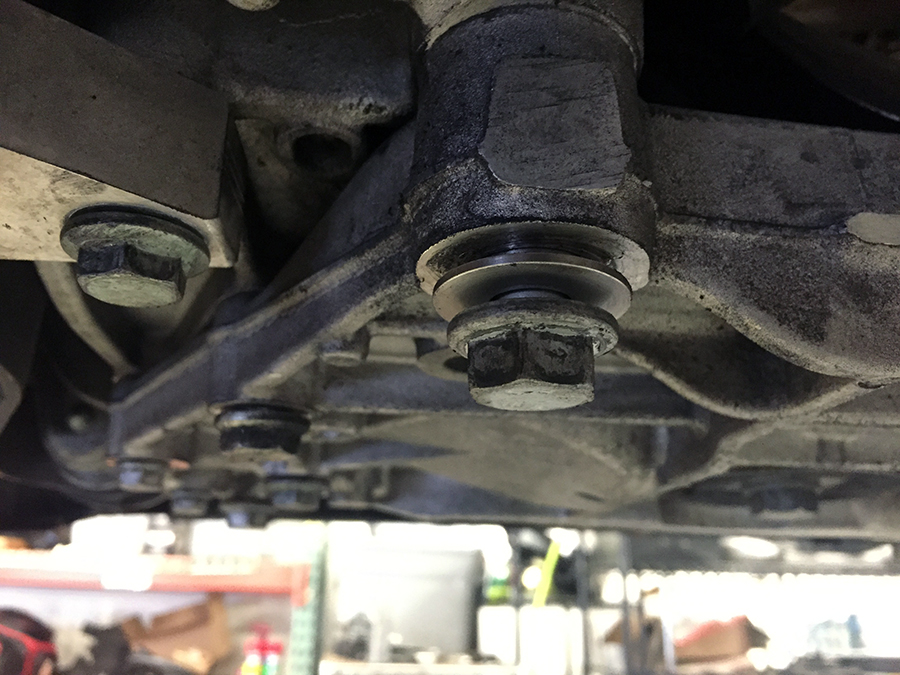
Step 11 – Next, remove the subframe to frame rail bolt, pictured below, on both sides using an 18mm socket. This is your last set of bolt-loosening exercises, so let out a few (manly?) grunts to let everyone know you’re perfecting your physique.
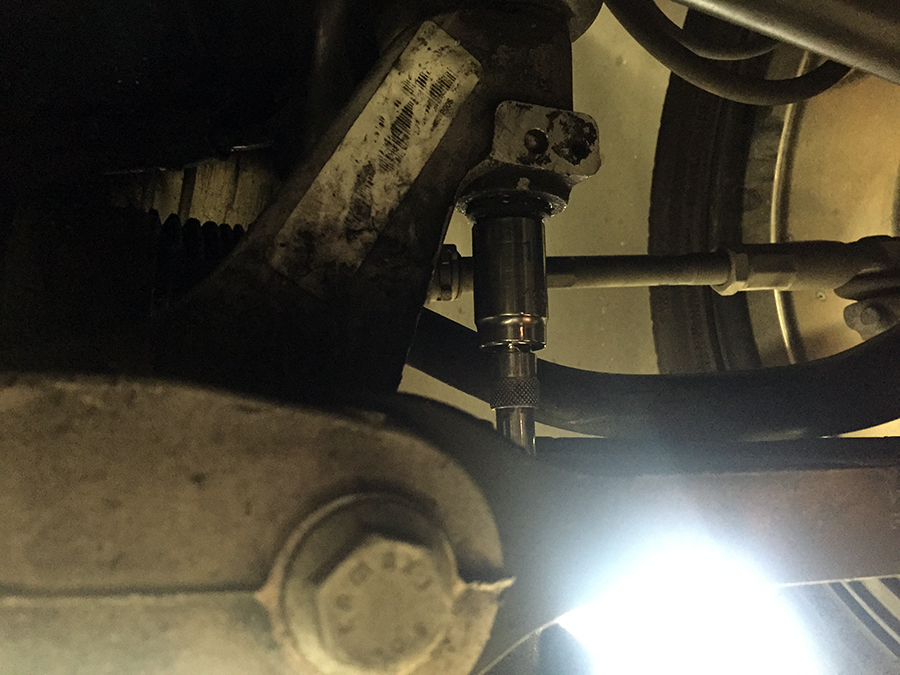
Step 12 – At this point, you should be a pro at installing the locking collars in the correct orientation, so keep doing what you have been for the last four, and thread in the supplied M12x90mm bolts when you’re done.
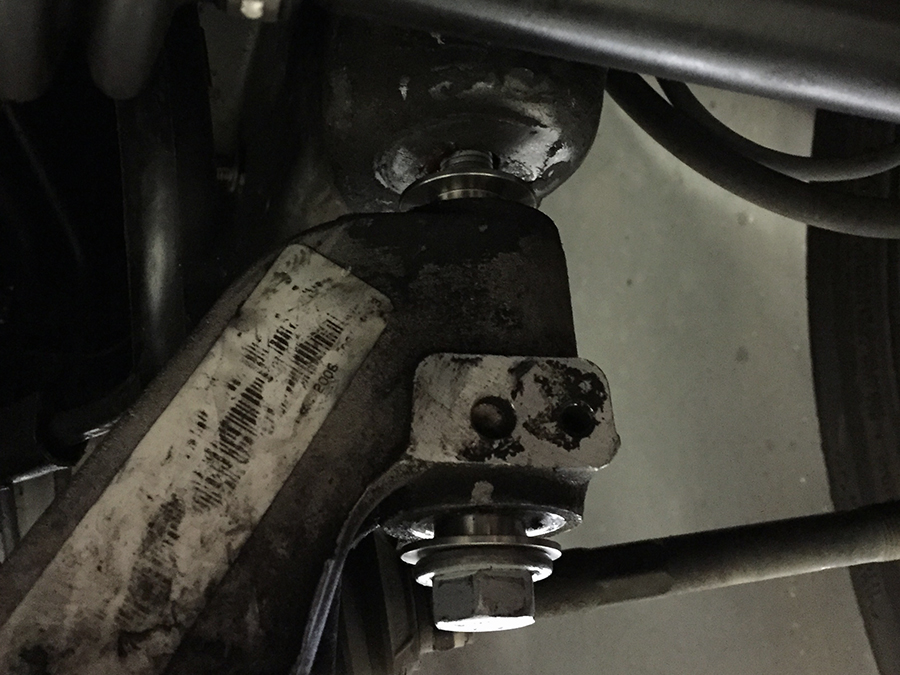
Step 13 – In the next step, you will tighten the subframe bolts. Using a jack or support, you can raise the subframe to help align the collars before tightening, which may make the process easier.
Step 14 – Start by tightening the 6 subframe bolts you replaced, where the locking collars were installed. These bolts should be torque to 52 foot-pounds + 90 degrees. Bolts with 16mm heads are tightened to 52 foot-pounds. Bolts with 13mm heads are tightened to ~20 foot-pounds.
Step 15 – Reinstall the dogbone mount, and tighten bolts to 54 foot-pounds.
Step 16 – Tighten the exhaust hanger bolts until they are snug.
Step 17 – That was some hard work! Grab your shaker and mix up a post-success protein shake. If your arms are too tired from tightening subframe bolts to spec, have a friend help out to ensure you don’t end up with any of those nasty clumps. Find a bro nearby to give a high-five to.
Step 18 – Get an alignment! While the steering wheel may not be off-center, dropping the subframe affects the vehicle’s suspension geometry and requires an alignment.
Step 19 – Enjoy the upgrade!
Step 20 – Like the improvement? Leave a review for this part on our website! Want to tell more enthusiasts about this part? Post about it on GolfMkV, GolfMk6, VWvortex, AudiRevolution, AudiWorld, Audizine, Fourtitude, or QuattroWorld!
